Raving about makeup, skincare, hair and other little obsessions... A Beauty Blog

Saturday, September 1, 2012

Illamasqua's Price Drop!

You may or may not have already heard of the good great news! Regardless, I thought it's very much worth doing a quite post about it. I received an email from Illamasqua, announcing that they have dropped their prices!


Since it's officially spring in Australia now, this is the perfect opportunity for us Aussie ladies to stock up on some new makeup to go with the season!


I did a comparison of Australia's new Illamasqua prices and America's Illamasqua prices (on Sephora) and I'm thrilled to say that (most of) the price difference is literally just a couple of dollars! I'll definitely be popping by an Illamasqua counter soon!

What do you think of the price drop? Isn't it just wonderful?!!

Triple S: Lash Mishap!

Something really awful happened. I chopped off a tuft of my lashes with my cheap eyelash curler. At first, I didn't realise what was happening. I was putting on mascara and I thought something looked odd. My lashes didn't look full like they usually do. I pulled up my lashes to check and found a "big gap" in my lashes.


After Googling frantically for a reason to my abruptly shortened lashes, I discovered that cheap eyelash curlers tend to cut off lashes. I deduced that it's the poor design. If you look carefully at the photo above you can probably see a couple of lashes have been pinched to right angles. In due time, it becomes a weak point and the lashes snap off. I hope I am making sense!

The Culprit!

I was so peeved that I went and bought myself a new eyelash curler from Shiseido shortly after the incident. It wasn't an impulse buy though. At first, I told myself that this was a sign to buy the Shu Uemura Eyelash Curler that I've been lusting after for quite a while. After having done my research, I found that a lot of consumers are happy with Shiseido's and it is a lot more affordable than Shu Uemura's at the price of AUD25. In fact, a lot of reviewers say that it is equally good, if not better than Shu Uemura's.


Apart from testing it out at Shiseido's counter, I have yet to actually try this curler out. The Shiseido lady was very lovely and I liked how my lashes turned out when she curled them. When I tried it on my other eye, it did not turn out the same but she promised me that it will with practise. I will probably do a review on this product in the future, once I've fully trialled it. For now, I am going to leave my lashes alone as much as possible, so that it can grow. Hopefully by applying olive oil/vitamin E oil to them, it will speed up the process a little bit and strengthen them. I will have to wear false lashes for events and dinners for quite a while... 

So ladies, beware!! You might want to be careful when using a cheap eyelash curler. You might want to do some research and think twice before you purchase a cheap $3 eyelash curler from the Japanese beauty stall at a market! Lesson learnt!

Have you had this experience before? How did you get through it?
Wednesday, August 29, 2012

Wicked Wednesday: If You Have a Lot of Time to Kill...

 As promised in the winners announcement post, here are the videos that I've made.

In these videos, you'll get to hear suggestions/comments made by other entrants. I also let you know my thoughts on them and give you an idea as to which requests I will be fulfiling! I apologise for the poor quality; I was using my brother's old film camera. Forgive me for the length, there were 98 entries to go through! I ended up cutting a lot of them out. What and you'll see why!


I spent A LOT of time filming and editing these videos and trying to upload them onto Youtube. I hope you liked them! Fingers crossed that you don't feel like I have wasted half an hour of your lives...

What do you think of the videos? Should I make the occasional video or just stick to writing?
Sunday, August 26, 2012

Lauren Conrad Style Top Bun with a Hair Donut (Tutorial & Mini Review)

Please allow me to introduce to you my awesome friend, Marj. She is a fun-loving, free-spirited and cheerful girl who has kindly agreed to be my model for this hair tutorial.


Remember the post that I made some time back about buying a hair donut? Well today, I will show you how to use it (hopefully) to do a Lauren Conrad Style Top Bun!

Stylebistro.com

I will also do a quick review on the hair donut at the end of this post. So let's begin!


Marj has very long hair. The photo above is to give you an idea how long it is. She would need a hair donut that is at least medium-sized or larger to "fit all of her hair in". Before we started, I brushed her hair and prepped it with Aveda's Light Elemenets Smoothing Fluid to make her locks smooth, soft and shiny.


Step 1. Tilt your head forward and gather all of your hair into one big bunch. If you have a fringe, you can leave them out.


Step 2. Lift your head back up and tie the bunch of hair into a high pony tail. The position of your ponytail depends on where you want your bun to sit. For example, If you want your bun to sit directly on top of your head, then your ponytail should be on top of your head. In Marj's case, she did it a little towards the back of her head.


Step 3. Now, grab your hair donut and put all five of your finger through the centre of the donut. Start pulling your hair/ponytail through the centre. It's similar to how you put on a scrunchie (except you don't twist the donut and loop it around).


Step 4. Pull all of your hair/ponytail all the way through and make sure that the donut is sitting against your head.


Step 5. Next, tilt your head slightly forward and spread your hair over the donut and smooth them down as evenly as you can.


Step 6. Start by taking a lock of hair and pull it diagonally across and backwards (making sure that the donut is covered by the hair). In the process, start tucking the hair under the donut. Keep one hair on top of the bun to have better control and to make sure the bun will turn out smooth.


The photo above is a side shot of the previous photo.


Step 7. Pin that lock of hair down with a bobby pin. Make sure you direct your pin towards the centre of the bun and make sure pin will end up hiding underneath the donut.


Step 8. Continue with the same process (Step 6 & 7) around your head/donut. Make sure you stick with the same direction. Don't worry if there is "leftover" hair (the remaining length of your hair). Just gather it and combine it with the next lock and it will eventually get tucked in under the donut/bun. If you've already covered the whole donut with hair and you still have some lengths of hair left out, just twist it a little and tuck it around and under your bun. Pin it in place to avoid your bun coming undone.


Step 9. Pin up any loose/stray hair (that are too short ot be included in the bun).


And there you have it! A Lauren Conrad-esque top bun!


It's okay if the do looks a bit messy. It just makes it look effortless. Doesn't Marj look pretty? I think so too!

Review: Overall, this is a good little hair accessory to have but it is expensive at AUD10. You can make a sock bun, which would be cheaper, but the size won't be as big and the shape won't be as smooth. Not that it really matters. The quality is decent and I think it will last me a very long time (fingers crossed). My sock buns are fraying where I had cut off the toe area.

I would like to thank Marj for letting me play with her hair.  I would also like to thank RLD photos for taking and editing the photos. If you liked the photos in this post, please feel free to like his Facebook page! He will be uploading extra photos in the near future.

What do you think of this hair tutorial? Was it helpful? Would you like a sock bun version of this tutorial? Please leave a comment below! Thank you!
Saturday, August 25, 2012

Triple S: Mega Giveaway WINNERS Announced

It is finally time for me to announce the winners of my MEGA GIVEAWAY! I am going to keep the writing part of this post short because I've made a video (split into 3 parts) on how I chose the winners and why. I'll be posting up the videos on Wednesday, so keep your eyes out for them!

First place winner is Jenny Ma! Congratulations!
Her winning comment:
"Dear Ty,

Jenny has been diagnosed with a severe case of Organised-Makeup-Phobia. As a result, her cosmetic collection is absolutely chaos, causing her to be late to work each morning, as she conducts fruitless searches into her drawers of makeup for the right product. This has also means that she only has about 5 products on regular rotation, leaving many makeup items sad and unloved.

As a result, the doctor has prescribed her with a ‘Makeup Collection, Storage and Vanity’ post on Ty’s Blog of Epiphanies. She would particularly love to see how Ty stores her larger eyeshadow palettes, particularly her Urban Decay and Bobbi Brown. Jenny also enjoys salivating over picture-heavy posts with neatly organized make-up sitting comfortably in their trays. And, seeing the amount of covetable products Ty owns, this would be Ty-Dy-For!

Can’t wait to see your post, after all, it’s just what the Doctor prescribed!

Love,

Jenny’s Fingers (currently tapping away on keyboard).
"

Second place winner is Saziya Parekh!
Her winning comment: "Beauty/Makeup Advice Session!"

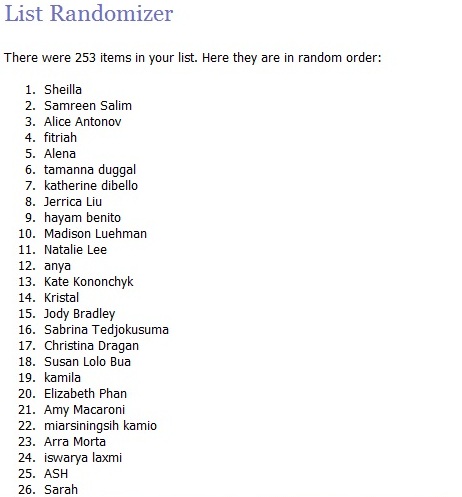
Third place winner (selected throught Random.org) is anya! 


This is how I chose the 3rd place winner: I put all of the entries into a list randomizer and then generated a random number and matched it to the person on the list.


Congratulations, ladies! Be sure to reply to my email within 48 hours or new winners will be chosen. If you did not win, please don't fret, my pet! There will be more giveaways/contests to come! Have a lovely day.

I would like to thank everyone for their support and for reading my blog. I will continue to do my best to provide useful and interesting content for you to read. Thank you!