Hey ladies, here's my Pinspiration Look #2! Click here for
#1. Please read on for the tutorial.
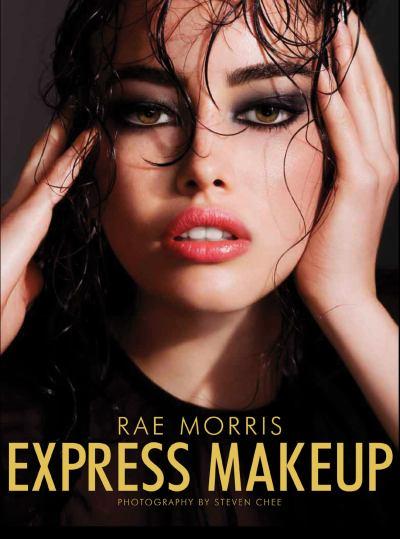
I was inspired by this Twiggy-esque photo I found on Pinterest; and decided to do a makeup based on it and on Twiggy, of course.
 |
| Pinterest.com |
 |
| Last.fm |
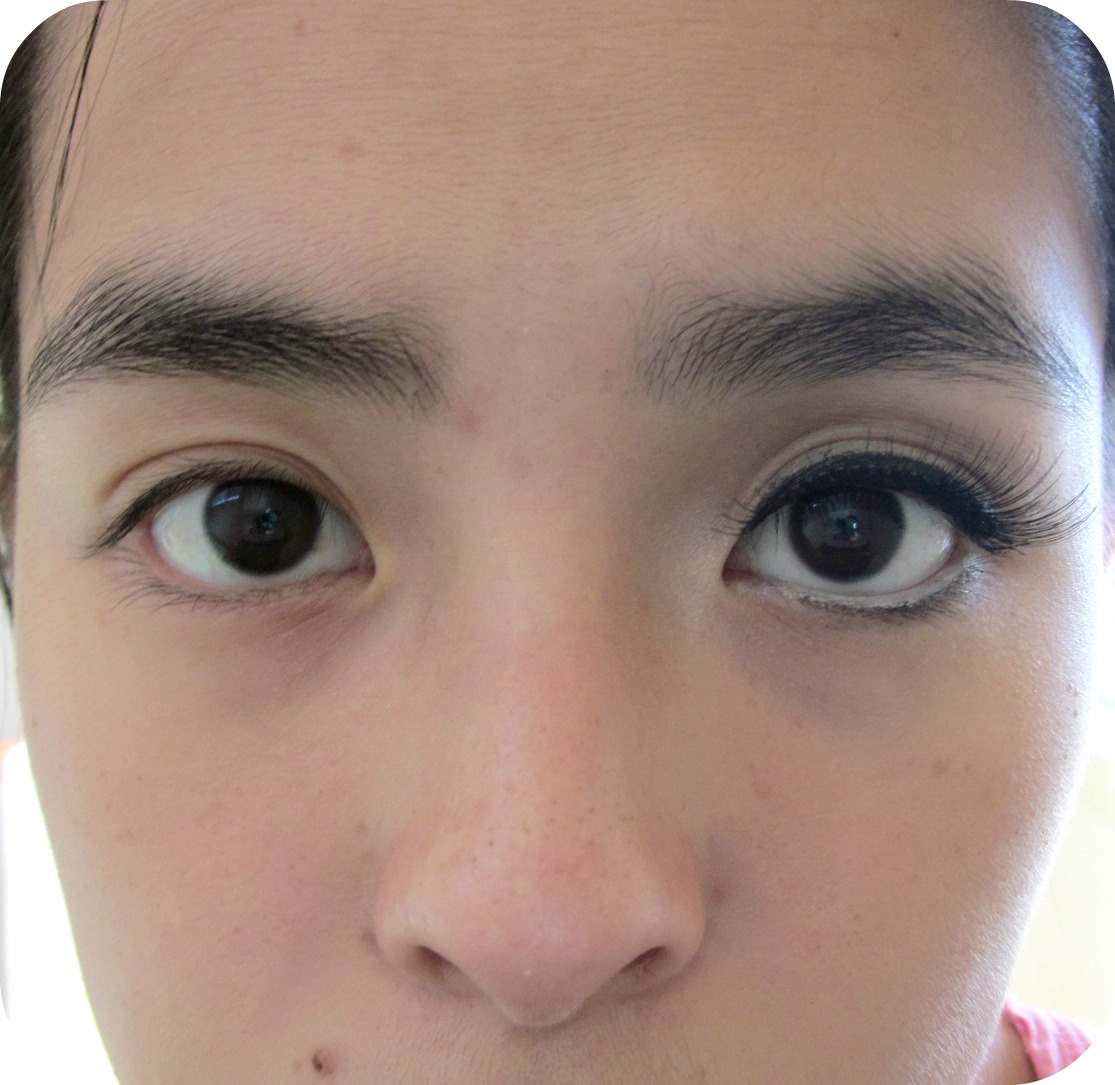
First, please allow me to introduce my gorgeous friend, Sophia (first photo above and photo below), who kindly agreed to be my model for this tutorial. With her slightly outgrown pixie cut, big beautiful eyes and porcelain skin, I knew she's the perfect model for this look. However, fret not. This look works on
anyone, which I will explain why in the moment.
Step 1. I prepped Sophia's skin with Estee Lauder's Idealist Even Skintone Illuminator to give her a bit of a glow. This was followed by a layer of moisturiser. After that I got Sophia to apply foundation and she did so with her fingers, which she usually does. Because this is a pretty flawless look, and if you don't have amazing skin like Sophia's, I'd recommend you buff your foundation in with a densely packed flat-top brush of your choice.
Step 2. Cut out two strips of Scotch tape. Stick them onto the back of your hand completely and then peel them off. This is to make them less adhesive so that they don't damage/hurt your eye area when you take them off later. Place the strips of tape on the edge of your eyes at an angle (as shown in the photo above). I lined the edge of Sophia's eye with the tip of an eyebrow. You can choose a different angle if you like. Slant the tape out more if you want a more cat-eyed look.
Step 3. Wet your angled eyeliner brush with water. Make sure to squeeze out the excess water or dab it off with tissue. Dip your brush into a matte black eyeshadow (I used Bobbi Brown's) and trace out your socket line.
Step 4.Colour in your mobile lid with the damp matte black eyeshadow, right up to the tape. You may have to do two layers of eyeshadow to make sure the eye lid is completely black for a more dramatic effect.
Step 5. Here's what your eyes will look like after you've coloured your mobile lids in with black eyeshadow. If you deem it necessary, you can tight line with a black pencil liner. But I find that the fleshy bits on the upper lid is generally covered up after you put on mascara. Fill in and comb through your brows if needed.
Step 6. Line your (lower) waterline with either a nude or white pencil liner. Sophia used a white pencil eyeliner.
Step 7. Apply
tonnes of black mascara! Sophia is blessed with wonderfully long and curly lashes. If you're not so lucky, like me, curl your lashes first before applying mascara. Then apply false lashes if you like.
Step 8. Twiggy's lower lashes were painted on with liquid liner. I thought that for a more modern and wearable look, we'd just stick with putting mascara on the lower lashes. Tip: one method is to use the tip of your mascara wand to paint the product on your lower lashes with small strokes.
Step 9. To bring more life to your eyes, brighten the inner corner of your eyes with either a light eyeshadow or light eye pencil. I got Sophia to draw her inner corners with her white pencil liner and then blend it out with her finger.
Tip: blend makeup products out with your ring (fourth) finger because it is the cleanest finger. Also it is the weakest finger, so it is the gentlest.
Step 10. Apply a pinky nude lip colour to your lips. You may use a lipstick if you like. Here I got Sophia to fill in her lips with a Mirenesse Auto Lip Liner Duet in Naughty Nudes (the light pinky end). It's so creamy that it passes as a lipstick!
Step 11. You may leave your cheeks blank if you like. After all, the main focus is the eyes. For Sophia, she blended on a bit of rosy pink cream blush onto the apples of her cheeks for a subtle glow.
Step 12. It is my belief that no glamorous look is complete without highlighter. I applied a cream highlighter (Benefit's Watt's Up) with a flat foundation brush onto the tops of Sophia's cheek bones. You may apply some under the arches of your brows as well if you like. I blended the highlighter out even further with my ring finger. Subtlety is key.
Voila! The finished look!
I hope you love the look as much as I do! I also hope that you enjoyed this tutorial.
I would like to thank Sophia, my lovely model and
RLD Photos, my wonderful photographer.
What do you think of this makeup look? Isn't Sophia simply gorgeous?!