As promised in the winners announcement post, here are the videos that I've made.
In these videos, you'll get to hear suggestions/comments made by
other entrants. I also let you know my thoughts on them and give you an
idea as to which requests I will be fulfiling! I apologise for the poor
quality; I was using my brother's old film camera. Forgive me for the length, there were 98 entries to go through! I ended up cutting a lot of them out. What and you'll see why!
I spent A LOT of time filming and editing these videos and trying to upload them onto Youtube. I hope you liked them! Fingers crossed that you don't feel like I have wasted half an hour of your lives...
What do you think of the videos? Should I make the occasional video or just stick to writing?
Wednesday, August 29, 2012
Sunday, August 26, 2012
Lauren Conrad Style Top Bun with a Hair Donut (Tutorial & Mini Review)
Please allow me to introduce to you my awesome friend, Marj. She is a fun-loving, free-spirited and cheerful girl who has kindly agreed to be my model for this hair tutorial.

Remember the post that I made some time back about buying a hair donut? Well today, I will show you how to use it (hopefully) to do a Lauren Conrad Style Top Bun!
I will also do a quick review on the hair donut at the end of this post. So let's begin!

Marj has very long hair. The photo above is to give you an idea how long it is. She would need a hair donut that is at least medium-sized or larger to "fit all of her hair in". Before we started, I brushed her hair and prepped it with Aveda's Light Elemenets Smoothing Fluid to make her locks smooth, soft and shiny.

Step 1. Tilt your head forward and gather all of your hair into one big bunch. If you have a fringe, you can leave them out.

Step 2. Lift your head back up and tie the bunch of hair into a high pony tail. The position of your ponytail depends on where you want your bun to sit. For example, If you want your bun to sit directly on top of your head, then your ponytail should be on top of your head. In Marj's case, she did it a little towards the back of her head.

Step 3. Now, grab your hair donut and put all five of your finger through the centre of the donut. Start pulling your hair/ponytail through the centre. It's similar to how you put on a scrunchie (except you don't twist the donut and loop it around).

Step 4. Pull all of your hair/ponytail all the way through and make sure that the donut is sitting against your head.

Step 5. Next, tilt your head slightly forward and spread your hair over the donut and smooth them down as evenly as you can.

Step 6. Start by taking a lock of hair and pull it diagonally across and backwards (making sure that the donut is covered by the hair). In the process, start tucking the hair under the donut. Keep one hair on top of the bun to have better control and to make sure the bun will turn out smooth.

The photo above is a side shot of the previous photo.

Step 7. Pin that lock of hair down with a bobby pin. Make sure you direct your pin towards the centre of the bun and make sure pin will end up hiding underneath the donut.

Step 8. Continue with the same process (Step 6 & 7) around your head/donut. Make sure you stick with the same direction. Don't worry if there is "leftover" hair (the remaining length of your hair). Just gather it and combine it with the next lock and it will eventually get tucked in under the donut/bun. If you've already covered the whole donut with hair and you still have some lengths of hair left out, just twist it a little and tuck it around and under your bun. Pin it in place to avoid your bun coming undone.

Step 9. Pin up any loose/stray hair (that are too short ot be included in the bun).

And there you have it! A Lauren Conrad-esque top bun!

It's okay if the do looks a bit messy. It just makes it look effortless. Doesn't Marj look pretty? I think so too!
Review: Overall, this is a good little hair accessory to have but it is expensive at AUD10. You can make a sock bun, which would be cheaper, but the size won't be as big and the shape won't be as smooth. Not that it really matters. The quality is decent and I think it will last me a very long time (fingers crossed). My sock buns are fraying where I had cut off the toe area.
I would like to thank Marj for letting me play with her hair. I would also like to thank RLD photos for taking and editing the photos. If you liked the photos in this post, please feel free to like his Facebook page! He will be uploading extra photos in the near future.
What do you think of this hair tutorial? Was it helpful? Would you like a sock bun version of this tutorial? Please leave a comment below! Thank you!

Remember the post that I made some time back about buying a hair donut? Well today, I will show you how to use it (hopefully) to do a Lauren Conrad Style Top Bun!
 |
| Stylebistro.com |
I will also do a quick review on the hair donut at the end of this post. So let's begin!

Marj has very long hair. The photo above is to give you an idea how long it is. She would need a hair donut that is at least medium-sized or larger to "fit all of her hair in". Before we started, I brushed her hair and prepped it with Aveda's Light Elemenets Smoothing Fluid to make her locks smooth, soft and shiny.

Step 1. Tilt your head forward and gather all of your hair into one big bunch. If you have a fringe, you can leave them out.

Step 2. Lift your head back up and tie the bunch of hair into a high pony tail. The position of your ponytail depends on where you want your bun to sit. For example, If you want your bun to sit directly on top of your head, then your ponytail should be on top of your head. In Marj's case, she did it a little towards the back of her head.

Step 3. Now, grab your hair donut and put all five of your finger through the centre of the donut. Start pulling your hair/ponytail through the centre. It's similar to how you put on a scrunchie (except you don't twist the donut and loop it around).

Step 4. Pull all of your hair/ponytail all the way through and make sure that the donut is sitting against your head.

Step 5. Next, tilt your head slightly forward and spread your hair over the donut and smooth them down as evenly as you can.

Step 6. Start by taking a lock of hair and pull it diagonally across and backwards (making sure that the donut is covered by the hair). In the process, start tucking the hair under the donut. Keep one hair on top of the bun to have better control and to make sure the bun will turn out smooth.

The photo above is a side shot of the previous photo.

Step 7. Pin that lock of hair down with a bobby pin. Make sure you direct your pin towards the centre of the bun and make sure pin will end up hiding underneath the donut.

Step 8. Continue with the same process (Step 6 & 7) around your head/donut. Make sure you stick with the same direction. Don't worry if there is "leftover" hair (the remaining length of your hair). Just gather it and combine it with the next lock and it will eventually get tucked in under the donut/bun. If you've already covered the whole donut with hair and you still have some lengths of hair left out, just twist it a little and tuck it around and under your bun. Pin it in place to avoid your bun coming undone.

Step 9. Pin up any loose/stray hair (that are too short ot be included in the bun).

And there you have it! A Lauren Conrad-esque top bun!

It's okay if the do looks a bit messy. It just makes it look effortless. Doesn't Marj look pretty? I think so too!
Review: Overall, this is a good little hair accessory to have but it is expensive at AUD10. You can make a sock bun, which would be cheaper, but the size won't be as big and the shape won't be as smooth. Not that it really matters. The quality is decent and I think it will last me a very long time (fingers crossed). My sock buns are fraying where I had cut off the toe area.
I would like to thank Marj for letting me play with her hair. I would also like to thank RLD photos for taking and editing the photos. If you liked the photos in this post, please feel free to like his Facebook page! He will be uploading extra photos in the near future.
What do you think of this hair tutorial? Was it helpful? Would you like a sock bun version of this tutorial? Please leave a comment below! Thank you!
Saturday, August 25, 2012
First place winner is Jenny Ma! Congratulations!
Her winning comment:
"Dear Ty,
Jenny has been diagnosed with a severe case of Organised-Makeup-Phobia. As a result, her cosmetic collection is absolutely chaos, causing her to be late to work each morning, as she conducts fruitless searches into her drawers of makeup for the right product. This has also means that she only has about 5 products on regular rotation, leaving many makeup items sad and unloved.
As a result, the doctor has prescribed her with a ‘Makeup Collection, Storage and Vanity’ post on Ty’s Blog of Epiphanies. She would particularly love to see how Ty stores her larger eyeshadow palettes, particularly her Urban Decay and Bobbi Brown. Jenny also enjoys salivating over picture-heavy posts with neatly organized make-up sitting comfortably in their trays. And, seeing the amount of covetable products Ty owns, this would be Ty-Dy-For!
Can’t wait to see your post, after all, it’s just what the Doctor prescribed!
Love,
Jenny’s Fingers (currently tapping away on keyboard)."
Second place winner is Saziya Parekh!
Her winning comment: "Beauty/Makeup Advice Session!"
Third place winner (selected throught Random.org) is anya!
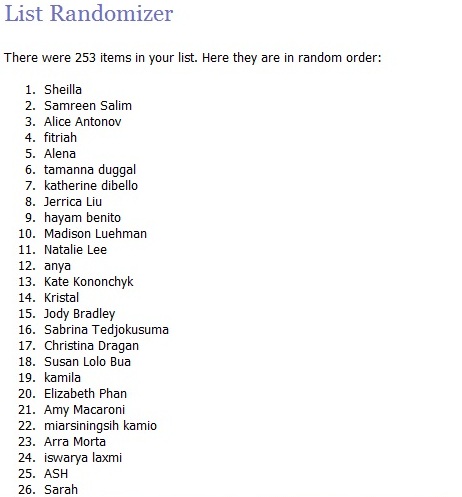
This is how I chose the 3rd place winner: I put all of the entries into a list randomizer and then generated a random number and matched it to the person on the list.


Congratulations, ladies! Be sure to reply to my email within 48 hours or new winners will be chosen. If you did not win, please don't fret, my pet! There will be more giveaways/contests to come! Have a lovely day.
I would like to thank everyone for their support and for reading my blog. I will continue to do my best to provide useful and interesting content for you to read. Thank you!
Triple S: Mega Giveaway WINNERS Announced
It is finally time for me to announce the winners of my MEGA GIVEAWAY! I am going to keep the writing part of this post short because I've made a video (split into 3 parts) on how I chose the winners and why. I'll be posting up the videos on Wednesday, so keep your eyes out for them!
First place winner is Jenny Ma! Congratulations!
Her winning comment:
"Dear Ty,
Jenny has been diagnosed with a severe case of Organised-Makeup-Phobia. As a result, her cosmetic collection is absolutely chaos, causing her to be late to work each morning, as she conducts fruitless searches into her drawers of makeup for the right product. This has also means that she only has about 5 products on regular rotation, leaving many makeup items sad and unloved.
As a result, the doctor has prescribed her with a ‘Makeup Collection, Storage and Vanity’ post on Ty’s Blog of Epiphanies. She would particularly love to see how Ty stores her larger eyeshadow palettes, particularly her Urban Decay and Bobbi Brown. Jenny also enjoys salivating over picture-heavy posts with neatly organized make-up sitting comfortably in their trays. And, seeing the amount of covetable products Ty owns, this would be Ty-Dy-For!
Can’t wait to see your post, after all, it’s just what the Doctor prescribed!
Love,
Jenny’s Fingers (currently tapping away on keyboard)."
Second place winner is Saziya Parekh!
Her winning comment: "Beauty/Makeup Advice Session!"
Third place winner (selected throught Random.org) is anya!
This is how I chose the 3rd place winner: I put all of the entries into a list randomizer and then generated a random number and matched it to the person on the list.


Congratulations, ladies! Be sure to reply to my email within 48 hours or new winners will be chosen. If you did not win, please don't fret, my pet! There will be more giveaways/contests to come! Have a lovely day.
I would like to thank everyone for their support and for reading my blog. I will continue to do my best to provide useful and interesting content for you to read. Thank you!
Wednesday, August 22, 2012
Wicked Wednesday: Emily Blunt Inspired Makeup Tutorial
I wasn't aware of Emily Blunt (and her gorgeousness) until recently. I only noticed her after seeing the poster for the movie Five-Year Engagement. At first, I thought "Huh, interesting. Who is this actress?" I only started to get to know her (impersonally, of course) when I came across a small feature of her in an article written on Primped. A couple of weeks back, I was reading the June issue of madison (I take forever to read/finish a magazine) when I found an article on her in it.

The large photo of her (I believe, at the Tribeca Film Festival 2012) really caught my attention.The more I looked at the photo, the more I realise how amazing the makeup look she wore was! It's such a versatile look! It can go with practically any outfit, whether it's casual or formal.

Emily nailed her black eyeliner by having it nice and thick but not too flicked (or at least her makeup artist did). I also liked how the black eyeliner was balanced out with some gold shimmering eyeshadow under her eyes. I think that fuchsia is an all-rounder; you can wear it during both warmer and colder months. I'm currently obssessed with this lip colour so I'm giving Emily two thumbs-up for wearing it! Lastly, to avoid looking like a clown, Emily had her blush applied oh-so-subtly to her cheeks. Kudos to you and your makeup artist, Emily!
I love this look so much that I decided to recreate it. Besides that, I think that this look is universally flattering and I would like to show everyone that it can be easily achieved!

Step 1. I started off by covering my blemishes with concealer. You can put on foundation if you like, I just chose not to. Just remember to powder your face afterwards because for this look, Emily's skin was quite matte.

Step 2. For the eyeshadow, I used Urban Decay's Naked Palette in Half Baked. You don't have to use this particular eyeshadow. Any (lighter) gold shimmering eyeshadow will do.
 Step 3. This step is optional. I applied the gold eyeshadow all over my lid and stopped before my crease.
Step 4. I lined my lower lash line with the same gold eyeshadow. Using a pencil brush would be best but since I have yet to own one, I just used the edge of my stiff eyeshadow brush (from Urban Decay).
The last picture is to show you what you'll end up with after you're done with these steps.
 Step 5. Line your eyes with either black liquid or gel eyeliner. And do so thickly. Create a tiny flick at the end. Keep in mind that we are not aiming for cat eyes here. I used Bobbi Brown's matte black eyeshadow and a wet angled liner brush.
Step 6. Curl your lashes if necessary.
Step 7. Apply generous coats of mascara to your lashes. Don't forget to apply mascara to your bottom lashes as well. Emily's lashes looked very long but not particularly voluminous, you may want to choose a lengthening mascara if you want to stick as close to the original look as possible (but it really depends on your needs). I used Rimmel's Scandaleyes mascara, which is both lengthening and volumising on my lashes.

At the end of Step 7, my eyes looked like this. You may add false lashes if you wish (for more drama) but Emily kept her lashes looking quite natural.

Step 8. Moving on to the lips, I slicked on Revlon's Colorburst Lip Butter in Lollipop. This is my current favourite lipstick/balm and I will be posting up a review soon!

Step 9. I stopped at Step 8 but you may add a light blush if you wish. So ta-da! This is my finally look!
Do you like this look? What do you think of my tutorial? I'd love some feedback, thanks!

The large photo of her (I believe, at the Tribeca Film Festival 2012) really caught my attention.The more I looked at the photo, the more I realise how amazing the makeup look she wore was! It's such a versatile look! It can go with practically any outfit, whether it's casual or formal.

Emily nailed her black eyeliner by having it nice and thick but not too flicked (or at least her makeup artist did). I also liked how the black eyeliner was balanced out with some gold shimmering eyeshadow under her eyes. I think that fuchsia is an all-rounder; you can wear it during both warmer and colder months. I'm currently obssessed with this lip colour so I'm giving Emily two thumbs-up for wearing it! Lastly, to avoid looking like a clown, Emily had her blush applied oh-so-subtly to her cheeks. Kudos to you and your makeup artist, Emily!
I love this look so much that I decided to recreate it. Besides that, I think that this look is universally flattering and I would like to show everyone that it can be easily achieved!

Step 1. I started off by covering my blemishes with concealer. You can put on foundation if you like, I just chose not to. Just remember to powder your face afterwards because for this look, Emily's skin was quite matte.

Step 2. For the eyeshadow, I used Urban Decay's Naked Palette in Half Baked. You don't have to use this particular eyeshadow. Any (lighter) gold shimmering eyeshadow will do.

Step 4. I lined my lower lash line with the same gold eyeshadow. Using a pencil brush would be best but since I have yet to own one, I just used the edge of my stiff eyeshadow brush (from Urban Decay).
The last picture is to show you what you'll end up with after you're done with these steps.

Step 6. Curl your lashes if necessary.
Step 7. Apply generous coats of mascara to your lashes. Don't forget to apply mascara to your bottom lashes as well. Emily's lashes looked very long but not particularly voluminous, you may want to choose a lengthening mascara if you want to stick as close to the original look as possible (but it really depends on your needs). I used Rimmel's Scandaleyes mascara, which is both lengthening and volumising on my lashes.

At the end of Step 7, my eyes looked like this. You may add false lashes if you wish (for more drama) but Emily kept her lashes looking quite natural.

Step 8. Moving on to the lips, I slicked on Revlon's Colorburst Lip Butter in Lollipop. This is my current favourite lipstick/balm and I will be posting up a review soon!

Step 9. I stopped at Step 8 but you may add a light blush if you wish. So ta-da! This is my finally look!
 |
| With more sunlight. |
 |
| With less sunlight. |
 |
| With effects. |
Do you like this look? What do you think of my tutorial? I'd love some feedback, thanks!
Saturday, August 18, 2012
Triple S: Mega Giveaway... Extended!
Oh no, it's 18th of August! Or at least it is, where I live. That means the giveaway is closed now... Well, if you read the title of this post, you'd know that I'm extending the giveaway. Okay, this may not be a good thing for those of you who have already entered (more competition, your chances decreased, etc.) but it's a good thing for those who didn't get in on time.

To make things fair, there is now a slight alteration to one of the rules. If you've submitted an entry previously, you're now allowed to submit a second entry/suggestion. So if you felt that what you previously submitted wasn't a good enough entry, you enter a new one. Essentially, everyone is allowed up to TWO entries. For your second entry you do not need to give me your blog link again, I can work it out from your previous entry.
When does this giveaway actually close? 24th August 2012 at 11.59pm (Sydney, Australian time).
To recap, new rules:
1. This giveaway is open internationally.
2. You must be 18 years or older to enter.
3. You must be a follower of this blog (via Google Friend Connect).
4. You may enter TWICE, each entry being separate and unique from the other.
5. 1st and 2nd place winners will be chosen by me whilst the 3rd place via random.org.
6. Giveaway closes on 24th August 2012 at 11.59pm (Sydney, Australian time)!
So if you haven't entered my giveaway yet, now is your chance!
Wednesday, August 15, 2012
Wicked Wednesday: July Haul
Yes, I know what you're going to say, "Ty, you are waaaaay behind on your July Haul post!" I'm really sorry but I felt that it was more important that I published my previous posts first. Anyway, let's jump straight into it. Remember from my May Haul post, I said that I would not buy anything beauty-related in June because I spent too much in May? Well, if you look through this blog, you will find that the June Haul post is missing. So yes, I lasted through that month without purchasing any beauty products. Hooray! So came July, I treated myself to three. I know, it sounds stupid that I saved in June and I ended up spending in July. But who cares? These products are relatively affordable anyway.

After watching so many American Youtubers and hearing (reading) so many Australian bloggers rave about it, I finally jumped on the Revlon Colourburst Lip Butter bandwagon. I have to say that I'm not disapponinted, in fact I am impressed! The best bit is, I bought it when Target had a buy one get one free Sale. So I got one for myself and one for you (my lovely readers). Expect a review from me soon!
The second product that I purchased is Australis 10hr Waterproof Eye Pencil. I bought it because I've been keeping an eye out for a blue coloured eye pencil to do a duo-coloured eyeliner look. And after hearing from Emily how wonderful this product is, I decided to buy it. I plan on doing a review and a tutorial with it in the near future.
Lastly, I got myself another pair of MAC lashes because 1) My #33 are wonky and out of shape from repeated use and abuse. 2) I was in a bad mood that day and need a pick-me-up and 3) I really like the look of this pair! At first, I went up to the MAC counter asking for #7, they said they've been out of stock for quite a while now. My eyes caught this pair #32 and I knew I couldn't go wrong with them. I'll post up a photo when I get around to wearing them (and when actually remember to take a photo).
Have you tried any of these products? What do you think of it/them?
3 comments:
Tags:
australis,
Eye pencil,
False lashes,
Haul,
Lipstick,
MAC,
Revlon,
Wicked Wednesday

Saturday, August 11, 2012
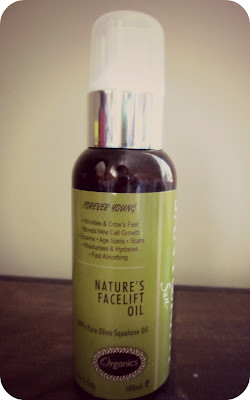
Triple S: Santorini Sun Nature's Facelift Oil Review
Hello ladies (and perhaps gents?)! Hope everyone is having a good weekend. Today I'll be reviewing a face oil by Santorini Sun. I was sent this product over a month ago and have been trying it out for a few weeks now, so I thought it's about time I wrote a review for it.
If you've never heard of Santorini Sun before, let me give you a quick run down:
- Australian company
- Makes cruelty-free products
- Uses natural ingredients (such as olives and oranges)
- Products are made in Australia
Now, back to their product, Nature's Facelift Oil


Overall, I love the concept of this product. It's functions are similar to Rosehip Oil, except it's much more affordable. Although it didn't work on my face, I have to say that it does not mean that it won't work for you. I'm thinking it might be good for anyone with oily skin to give it a go. It might be a means of keeping your cells from producing excess sebum. For more information on this product, click here. For a list of stockists click here. On a side note, I know the photo on their website of the product looks different, so I don't know which packaging you will be getting if you bought it online. I hope this review has been helpful!
Have you heard of Santorini Sun before? Which one of their products have you tried or would like to try?
If you've never heard of Santorini Sun before, let me give you a quick run down:
- Australian company
- Makes cruelty-free products
- Uses natural ingredients (such as olives and oranges)
- Products are made in Australia
Now, back to their product, Nature's Facelift Oil

Claims: Works on wrinkles and crow's feet; boosts new cell growth; works on eczema, age spots and scars; moisturises and hydrates; fast absorbing
Retail: AUD$29.95 for 100mL
Packaging: 4 out of 5
Review:
Firstly, I would like to talk about the packaging. I love how it came with a pump so it's very easy to dispense the amount you want. It's also hygienic because you're not pouring back in product that has been exposed to the air (that's full of dust and microbes). The bottle is made out of plastic. Although I prefer glass, I have to say that this means it's very light to carry around and it won't break easily even if you drop it.

This product is made out of Pure Olive Squalane Oil, which mimics our skin's sebum. The oil is clear (practically transparent) and absorbs into the skin quite quickly (as promised on the bottle). For the first two weeks of trialling this product, I applied it to my face in the morning and at night before I go to bed as religiously as I could. I found that my normal/combination skin became drier. In terms of moisturizing or hyrdating my skin it didn't work. It makes sense because my skin cells most likely detected an increase in oil, so they decreased their production of sebum to balance it out. Hence, my skin became drier.

The good news is, this oil has managed to lighten a scar on my thumb, slightly. I think if I keep applying and do so diligently, it will completely erase the scar. It also hasn't induced any breakouts, which is of utmost importance to me. However, I have to admit that I've stopped using it on my face and only use it on my body now. Yes, don't let the name fool you. So it's actually a face and body oil.

Have you heard of Santorini Sun before? Which one of their products have you tried or would like to try?
Wednesday, August 8, 2012
 Claims: Soften hands; minimises age spots; and strengthens nails
 Clinique Deep Comfort Hand and Cuticle Cream
 Claims: Contains all the goodness of the original cocoa butter formula for your hands with sun protection.
 L'Occitane Shea Butter Hand Cream
Wicked Wednesday: Battle of the Hand Creams
Spring may be only three weeks away but this does not mean that the weather stops being cold and drying. I still find myself reaching for my tube of hand cream as many times as I normally do in a day during mid-winter. If you haven't been using hand cream, it's never too late to invest in one. You will need it a lot if you work in an environment where the air-conditioning/heater is drying or if it involves you washing your hands countless times in a day. I've put together a list of hand creams that I have tried; they are arranged from my least favourite to the most.
Clarins Hand and Nail Treatment Cream
Claims: Soften hands; minimises age spots; and strengthens nails
Retail: AUD$40 for 100mL
Packaging: 4 out of 5
Review: I was given a 50mL tube of this product by a friend. I was really keen to try it out until I opened up the tube. It had a strong fragrance that is typcial of body/hand creams and it made me sneeze. I am not a fan of products with artificial (added) fragrances because they either irritate my nose or gives me headaches. That aside, I think this hand cream keeps my hands from drying up for half the day before I have to reapply. I do have spots/pigments on my hands but I don't think I've used this cream consistently enough to see any improvements. The cream is smooth and easy to spread but it takes a while to absorb into the skin.
 Clinique Deep Comfort Hand and Cuticle Cream
Claims: 12-hour hydration; strengthens moisture barrier against environmental
stressors; and conditions cuticles and nails.
Retail: AUD$32 for 75mL
Packaging: 3.5 out of 5
Review: I got the sample version of this hand cream as a gift from another friend (people seem to love giving me hand creams, don't they?). What I really liked about this hand cream was that it's fragrance-free, plus it's allergy-tested. I found that it makes my hands smooth and soft immediately after application, which I really liked. The downside of this product is that I found myself reapplying it every couple of hours. Perhaps it was because it was a particularly dry and cold winter. So for me, the "staying power" was poor. Other than that, I was happy with it.
Palmer's Cocoa Butter Formula Hand Cream SPF 15
 Claims: Contains all the goodness of the original cocoa butter formula for your hands with sun protection.
Retail: AUD$4.20 for 60g
Packaging: 4.5 out of 5
Review: I'm using this hand cream currently. What I really like about it is that it contains SPF. We often neglect our hands when it comes to protecting them from the deadly UV rays of the sun. The hands often age the fastest, apart from our faces and necks because they are exposed most of the time. It has a scent (which I believe originates from the cocoa butter) but it isn't foul, just tolerable. The cream is thick and harder to spread but I think you need no use as much per application compared to other hand creams. Because it is so "solid", it feels like it takes a while to absorb into the skin. I apply this very early in the morning before I head out the door and it lasts me till the evening.
 L'Occitane Shea Butter Hand Cream
Claims: Helps heal and protect dry or dehydrated
skin; anti-oxidizing vitamin E helps nourish hands.
Retail: AUD$12 / AUD$39 for 30mL / 150mL
Packaging: 4.5 out of 5
Review: I love this little tube of heaven! I've only tried it a few times (whenever my mum lends hers to me) but I just know that it's the perfect hand cream for me. It has a lovely subtle scent and the perfect consistency: not too thick and not too fluid. All you need is a very tiny amount and it moisturizes your hands immediately and effectively. My skin feels smooth and amazing, like it has just returned from a day spa! It also lasts most of the day. I'm hoping to get my hands on one of these once I empty my Palmer's hand cream!
I hope this post has given you an idea on what to look out for if you're shopping for a hand cream. If you already have/use hand creams, what's your favourite? Do share by commenting below.
3 comments:
Tags:
Bodycare,
Clarins,
Clinique,
Hand cream,
L'Occitane,
Palmer's,
Review,
Wicked Wednesday
Saturday, August 4, 2012
Winner of Wave Envy Giveaway
I don't normally put up two posts in one day but I was so excited that I couldn't wait till Wednesday (or tomorrow even) to announce the winner for my Wave Envy Giveaway.

To make things fair for all the entrants, I've decided to randomise everyone's entries (something that I wish I did for my earlier giveaways). So I put everyone's name into the List Randomizer on random.org.

As you can see there were a total of 17 entries and all of the names have been rearranged. This is so that it doesn't matter when you entered this giveaway.

Then, I generated a number randomly to come up with the winner!

Congratulations to Sarah! You're the winner of my Wave Envy Giveaway!

If Sarah does not reply my email within one week, I will redraw and announce a new winner. If you did not win this giveaway, don't fret my pets, I have another one running at the moment and it's even bigger than this one!!

To make things fair for all the entrants, I've decided to randomise everyone's entries (something that I wish I did for my earlier giveaways). So I put everyone's name into the List Randomizer on random.org.

As you can see there were a total of 17 entries and all of the names have been rearranged. This is so that it doesn't matter when you entered this giveaway.

Then, I generated a number randomly to come up with the winner!
Congratulations to Sarah! You're the winner of my Wave Envy Giveaway!

If Sarah does not reply my email within one week, I will redraw and announce a new winner. If you did not win this giveaway, don't fret my pets, I have another one running at the moment and it's even bigger than this one!!
Triple S: Photoshoot
I did this photoshoot at the start of the year to enter a photo competition. Just thought I'd share with you guys a couple of photos and the products I used to achieve the look.


For my face, I used:
- Bobbi Brown Natural Finish Foundation in Warm Beige
- Bobbi Brown Concealer in Warm Beige
- Bobbi Brown Sheer Finish Powder in Soft Sand
- Brown Brown Illuminating Bronzer in Aruba
- Bobbi Brown Blush in Nude Peach
Okay, so that soundsed like a lot of Bobbi Brown products. Allow me to rephrase: "For my face, the Bobbi Brown Makeup Artist used". Yes, so for my base, I did a 20 minute Secret To Perfect Skin lesson since that is the only way I could pull off a flawless face for the camera.
Moving on, for the eyes, I used:
- Urban Decay Naked Palette eyeshadows in Virgin, Sin and Toasted
- Bobbi Brown Eyeshadow in Matte Black as eyeliner
- Clinique High Impact Mascara
- MAC False Eyelashes in #33
Lastly, for my lips, I used Bobbi Brown Lip Gloss in Nougat (which went perfectly with the Nude Peach blush).
I would like to thank my wonderful photographer, RLD Photos.
Wednesday, August 1, 2012
Wicked Wednesday: MEGA GIVEAWAY... CLOSED
I would like to thanking all my lovely and loyal readers/supporters... with a massive giveaway.

There will be 3 winners: 1st, 2nd and 3rd place. Each winner will score 6 products! The 1st place winner will get to pick her 6 products out of the prize pool, then the 2nd. 3rd place will have the remaining prizes There will be one or two rules to the prize-picking process which I will go through with the winners when the time comes.
Here's a list of what is in the prize pool:
1. Benefit Cha Cha Tint
2. Lush Dirty Springwash Shower Gel
3. Schwarzkopf Curl Flex Shine Creme
4. Rimmel Scandaleyes Mascara
5. australis Paparazzi Perfect HD Eyeshadow in Snap Attack
6. Rimmel Lasting Finish by Kate Lipstick in 10 (which is a gorgeous red colour)
7. Revlon Top Speed in Modern Grace
8. Revlon Colorburst Lip Butter in Berry Smoothie
9. Nivea Invisible Anti-perspirant
10. Colgate Max White One toothpaste
11. Palmer's Foot Magic
12. Palmer's Purifying Mask
13. Naked Tan Bronzing Mousse
14. Maybelline Baby Lips in Energizing Orange
15. Burt's Bees Cranberry & Pomegranate Sugar Scrub
16. L'ORÉAL Sublime Mousse in 70 Pure Dark Blonde
17. Garnier Fructis Anti-dandruff Shampoo
18. Maybelline Master Liner
Edit: Before we proceed, here are some new RULES and general information:
1. This giveaway is open internationally (I wonder if I actually have any international followers).
2. You must be 18 years or older to enter.
3. You must be a follower of this blog (via Google Friend Connect).
4. You may enter TWICE, each entry being separate and unique from the other.
5. 1st and 2nd place winners will be chosen by me whilst the 3rd place via random.org.
6. Giveaway closes on 24th August 2012 at 11.59pm (Sydney, Australian time)!
So what do you have do to win? All you have to do is fill in your details and anwer the question in the form: What post would you like to see on this blog in the near future? I will choose the winners based on how much I like their suggestions. So get creative and catch my attention! The 3rd place winner will be selected at random out of the remaining entries. You can increase your chances of winning 3rd place by either posting my banner+link on the sidebar of your blog and/or by answering the two optional questions correctly. If you have any questions please leave a comment.
Good luck!!
Please link the banner below to this post. If you have any difficulty linking this banner, please let me know.
 |
| Banner |
Subscribe to:
Posts (Atom)