Raving about makeup, skincare, hair and other little obsessions... A Beauty Blog

Monday, December 30, 2013

December 2013 Haul

I recently went back to Singapore and Malaysia for yet another holiday. Now, if you remember my previous haul, you'd know that I bought some goodies from Singapore. YSL to be more exact. This time round, I did not buy anything from Singapore because duty-free prices seem to have gone up. On the other hand, I had the opportunity to shop to my heart's desire at Sephora while I was in Malaysia.


Here's a list of what I bought.
1. Tarte Amazonian Clay 12-Hour Blush in Blissful
2. Kiss Me Heroine Make Long & Curl Mascara
3. Urban Decay Revolution Lipstick in Turn On
4. Kiss Me Heroine Make Mascara Remover
5. Benefit Hydra-Smooth Lip Color in Dare Me
6. MAC Brush #109
7. Urban Decay 24/7 Glide-On Lip Pencil in Ozone
8. Urban Decay 24/7 Glide-On Eye Pencil in Rockstar
9. Urban Decay Naked Skin in 4.0
10. Shu Uemura Heart and Flower by Murakami S Curler
11. Benefit Brow Zings

Individual reviews and swatches to come! I can't wait to share with you my opinion of these products. I've tested quite a few of them out and I look forward to announcing my favourites.

Have you tried any of these products? Which are your favourites? 
Saturday, December 14, 2013

YSL Le Teint Touche Eclat Review


Le Teint Touche Eclat
Claims: "Targets shadowy areas and highlights the contours of the face. With buildable coverage and free of opaque fillers, the perfecting texture evens the complexion and conceals imperfections, enhancing the skin’s natural beauty."
RRP: AUD78
Packaging: 5 out of 5
Review: This is probably the most expensive makeup item I own. Particularly in terms of it's value. I was lucky enough to pick this up at the Duty Free section of Changi Airport as I mentioned in this post. Okay, let's get the obvious out of the way first. The packaging is absolutely gorgeous yet simple. I don't expect any less from YSL. I love that it comes with a pump for you to dispense the product. Plus points for hygiene!


This is a light coverage foundation that can be built up to medium with more layers (I demonstrate how this foundation covers up a lot of my facial imperfections below). It is also very lightweight and I don't notice its presence throughout the day. The lasting power is not excellent but is greatly improved when paired with a primer. I like to apply Benefit's Porefessional primer before hand.

Bare and cleansed

Visible pigmentation 

Using one full pump 

Applied with fingers, blended out with a Beauty Blender sponge

Less visible pigmentation 

The shade I own is B30 and it's a very good match for my skin, particularly my neck. This foundation can cover most of my pigmentation very well. I usually only need very little concealer for one or two very dark spots and a bit more for under my eyes. To the naked eye, my skin looks practically flawless. Whether it makes my skin look radiant, I cannot tell because I don't see it when I look in the mirror. But sometimes, when I look back at photos, I feel like it does.

Would I repurchase this product when it runs out? I'm not sure. It's very pricey and I get the feeling that I'm not completely head over heels with this product. I mean, I love it but I can live without it. I'm gonna try other foundations first before I can definitively say this is the only one for me.

What's your favourite foundation? How much are you willing to spend for the perfect foundation for your skin? 
Saturday, December 7, 2013

Lee Stafford Hair Growth Treatment Review


Lee Stafford Hair Growth Treatment 
Claims: "Fertilises your follicles whilst going deep down into the cortex to condition and strengthen from within. Reduces irritation and moisturises the scalp."
RRP: AUD16.99
Packaging: 5 out of 5
Review: I don't generally write negative reviews but this product, unfortunately, warrants one. I bought this because Sharon Farrell on Youtube recommended. She loves this product and says that it has helped her grow her hair longer. Upon further research, I found more positive reviews than negative ones. With my fingers crossed, I went out and bought this product.


This product has a very strong floral scent. The first few times I smelled it, I thought it was nice. After that, it started irritating my nose. That's the first strike. The first couple of times I used this treatment, my hair felt nice and soft afterwards. With subsequent uses, I felt like my hair was not benefiting from the use of this product. I did not see an increase in length of my hair. What's worse? Every time I used it, a pimple would pop up on my scalp a couple of hours later. And that was the last straw for me.

I've stopped using this treatment but have yet to get around to throwing it out. Just as well I bought it at 40% off. Otherwise, it would have been an even bigger waste of my money! I am not trying to say that this is an absolutely horrible and disgusting product. All I'm trying to do is warn you. This product could potentially cause scalp acne if it's not suitable for you. If this product has worked wonders for you, then that's good for you and I envy you!

Have you ever experienced any negative effects from using a hair treatment product?
Saturday, November 30, 2013

Purple and Gold Party Eye Makeup Tutorial


Party season is here! It's time to bring out your stash of amazing false eyelashes and glitter pigment. Today, I'm going to show you how to do a simple yet stunning purple and gold eye makeup. The star product of this tutorial is the Rimmel London Scandaleyes Eye Shadow Sticks in Paranoid Purple. 

Here are the steps: 


1. Prep your eyes with primer. Here I'm using Benefit's Stay Don't Stray Primer. I simple dot some product all over my eyelids and then blend it out when my ring finger. 


2. Apply Paranoid Purple all over your eye lid, staying below the crease and steering clear of the inner corners of your eyes. Blend it out a little with your ring finger. 


3. With an eye shadow brush, apply a deeper purple or brownish purple colour to the outer corners of your eyelids. I used Hustle from the Urban Decay Naked Palette.


4.  With a blending brush, work a neutral light brown colour into your crease. I used Naked from the Urban Decay Naked Palette. 


5. Swipe some Paranoid Purple onto your pencil brush and run the colour under your lower lash line. 


6. With an eyeshadow brush, pat some gold eyeshadow or pigment onto the inner corners of your eyes. I used Half Baked from the Urban Decay Naked Palette. 


7. Lastly, line your top lash line with long lasting black gel/liquid liner. Curl your lashes and apply lots of mascara 

8. This is optional. You can draw black liner on your top waterline and apply false eyelashes for an even more dramatic eye makeup look. 


I love purple and gold together. It's my favourite combination! 


I was partly inspired by the purple and gold top and necklace that I was wearing at the time. 


Please excuse the unruly brows!


Hope you found this helpful and enjoyed reading this post. I will be posting more tutorials using the Rimmel Scandaleyes Shadow Sticks soon. Keep an eye out! 


What's your go-to party eye makeup look?
Saturday, November 16, 2013

HG Search: Moisturiser - Kiehl's Ultra Facial Cream Review


Kiehl's Ulta Facial Cream 
Claims: "24 hour, light-textured hydrator. Reduces moisture loss. Continuous water replenishment throughout the day."
RRP: AUD34/AUD64 for 50mL/125mL
Packaging: 5 out of 5
Review: The first time I tried this product when was my mother bought a jar home and told me to try it. After cleansing and toning my face, I applied some all over my face and went to bed. The next morning, my skin still felt soft and smooth. It wasn't long before I went and got myself a 50mL jar too (R kindly paid for it). I've been using it for more than two months now and have hit the base of the jar. My mother has hit base too. And guess what? We went out and bought a 125mL jar each!


So by now, you'd know where this review is heading. Yes, this story has a "happy ending". You can stop reading now and go buy yourself one to try... Oh! You wanna know more? Okay then. This moisturising cream is very lightweight with a gel-like consistency. Kinda similar to the consistency of Bobbi Brown's Hydrating Gel Cream. It goes on smoothly and absorbs quickly so there's no sticky feeling. If you apply makeup soon after, it is tacky enough to work as a primer.

I love that this product keeps my face hydrated all day and night, regardless of whether the weather is wet/dry/warm/cold. It feels like I'm giving my skin water to drink. A word of warning though, if you have extremely dry skin, whereby it's peeling and patchy, this may not be powerful enough of a moisturiser for you; something like Creme de La Mer might be better for you. Otherwise, I am very happy with this product and it's currently my Holy Grail moisturiser. I know what you're gonna say. But it came in a jar! That's unsanitary! Well, as long as you wash your hands well with soap and dry them properly before dipping your fingers into the product, I don't see any problems with it, especially if it's solely for your own use. Hence, I have not deducted any points from packaging.


What's your Holy Grail moisturiser (if you have one)? 
Saturday, November 9, 2013

Rusk MiraCurl Review and Demo


Rusk MiraCurl
Claims: "Effortlessly creates perfect curls everytime... Has a ceramic curl chamber which eliminates frizz while leaving hair full of body, volume and luster."
RRP: AUD199
Packaging/Design: 4.5 out of 5
Review: This curler is very quick and easy to use. It takes me only 15 minutes to curl all my hair (I usually take half an hour with a regular curling iron). It's also very easy to learn how to use it and get the hang of it. The only reason I gave it a 4.5 out of 5 for package/design is because it's a bit heavy. Otherwise, it's an excellent hair styling tool. I give a more in-depth review and demo of the product in the video below. Note: I believe this product is called Curl Freak in the USA.


What do you guys think? Game to try this method of curling your hair?
Saturday, November 2, 2013

Nail Colours for Summer

Hey ladies, just thought I'd do a quick post on what colours I've been wearing on my nails lately.


For my fingers, I've been using OPI's Alpine Snow. I noticed that white is in trend right now, especially now that our weather Down Under is warming up. I really like it because it makes your digits look clean and sophisticated.


For my toes, I've been wearing OPI's Do You Lilac It? Seriously. Do you? I know I do! Purple is my favourite colour and the best way to keep it on my digits is to go for lighter shades during the warmer seasons. Please excuse my ugly blister patches...


Lastly, I just want to make a quick mention of another two hero nail products. The base coat and top coat. Both by OPI (of course!). The base coat keeps my nails from being stained and protects my nails from being stripped and peeled. I notice this whenever I remove my nail polish and my nails seem to take forever to recover. Now, it's no longer a problem. The top coat keeps my nail polish on for longer and gives it a beautiful shine. It also does not cause streaking like my previous Cutex base + top coat. Tip: avoid buying those two-in-ones. Generaly rule of thumb is that base and top coats do two different things and so should be two different formulas.


What's your favourite nail polish colours for this Summer?
Saturday, October 26, 2013

John Frieda Full Repair Shampoo, Conditioner and Deep Conditioner Review

It's been a really busy week and I'm really sorry I hadn't been able to write a post for Wednesday like I normally do. I'm afraid this is going to be the case for the next month or so. I have exams coming up and after that I'll be going overseas (on holiday). So please bear with me! I promise I do have some awesome tutorials planned, they just require a lot of time to make so they won't be up on this blog anytime soon. And yes, this also means that majority of my posts for the next month will be mainly reviews.

So, until I return from my trip around mid December, I'll only schedule posts for once a week. But after that, it'll be back to the normal schedule of twice a week (Wed and Sat). I also promise I will make it up to you guys. *hint hint* Giveaway to come! 

Anyway, let's dive into this review!


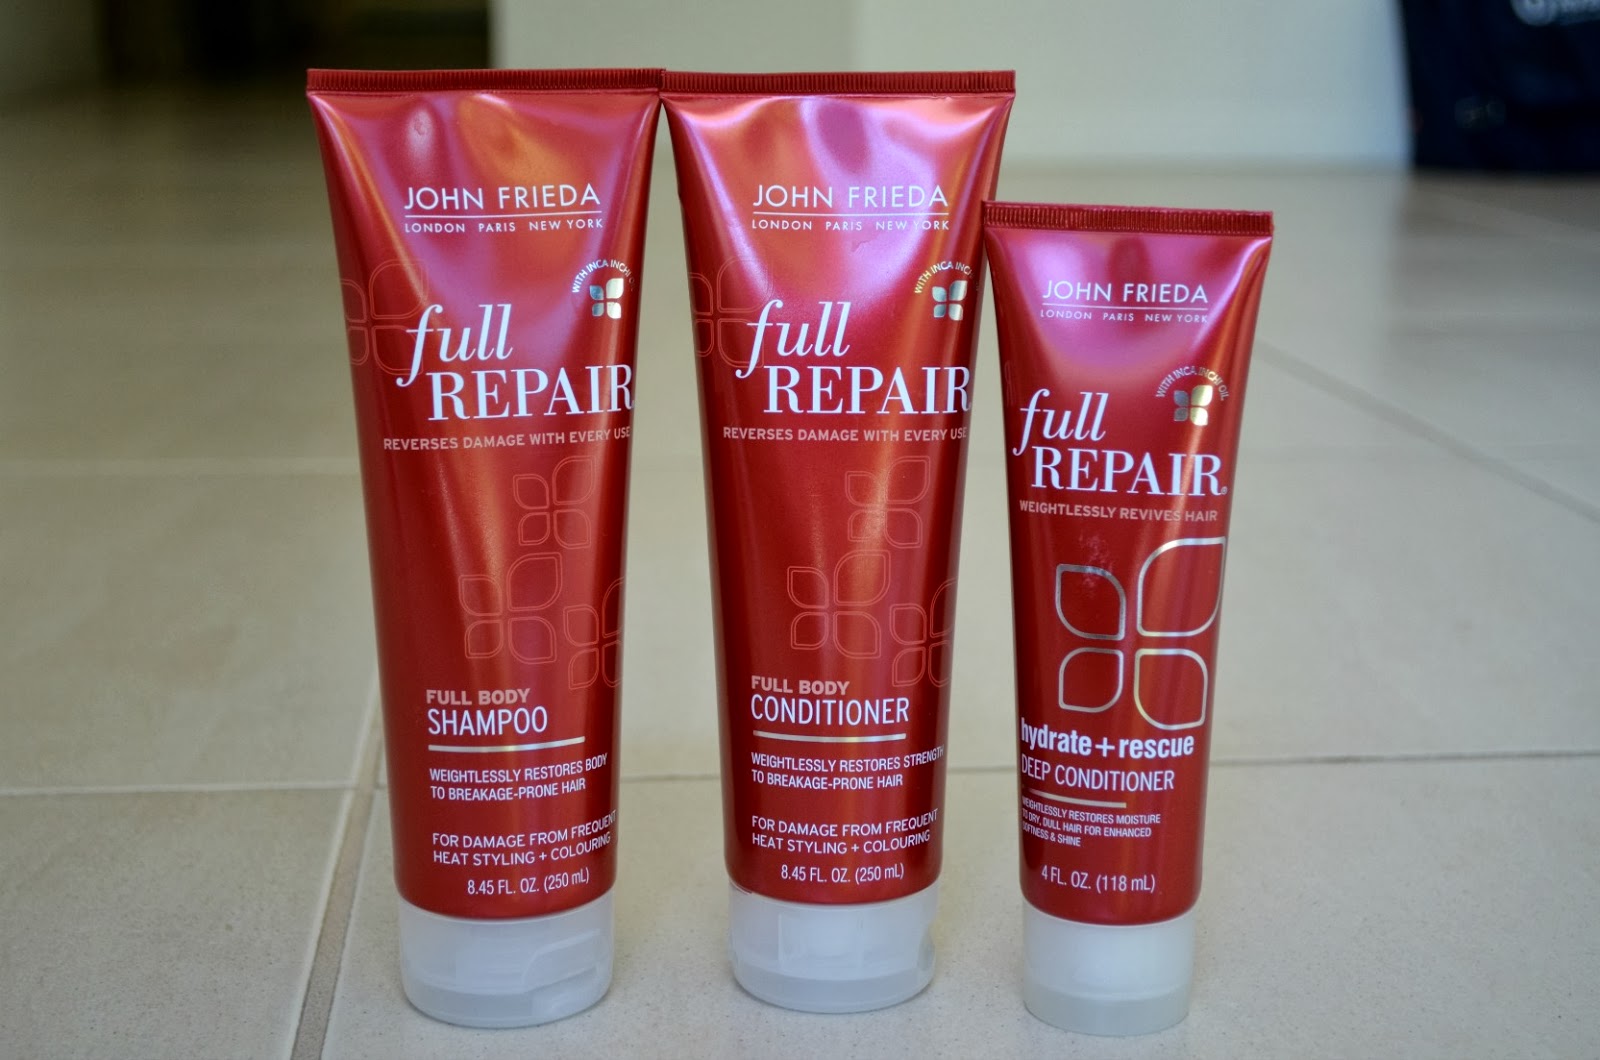
John Frieda Full Repair Full Body Shampoo
Claims: "Targets short, broken hairs, flyaways, and damaged ends. The shampoo is formulated with inca inchi oil, a micro-oil rich in Omega-3, which penetrates dry, damaged hair and repairs the look and feel of overworked hair."
RRP: AUD15.99
Packaging: 5 out of 5

John Frieda Full Repair Full Body Conditioner
Claims: "Penetrates dry, damaged hair and smoothes and detangles hair, reducing the risk of breakage."
RRP: AUD15.99
Packaging: 5 out of 5

John Frieda Full Repair Hydrate + Rescue Deep Conditioner 
Claims:  "Infuses the hair with moisture to improve the look and feel of damaged hair.The conditioner deeply replenishes and restores softness and shine, targeting hair in its most damaged areas."
RRP: AUD16.99
Packaging: 5 out of 5

Review: My hair has been feeling a bit dry lately. Perhaps it's due to the change in weather but it's really unhappy. I rarely get breakage and split-ends up they've suddenly popped up. I keep trimming them off for "damage control" but I know that I'd need a more long-term solution. Introducing...! Nah, I better stop sounding like an advert. So, I was sent the Full Repair range to try out. Although I have yet to see a reduction in breakage and split-ends, I do have positive findings to report.

Most hydration/repair type of hair care products weigh the hair down so we tend to lose body and volume as a compromise for soft silky strands. With this trio, I noticed that volume is retained and it adds moisture back into my hair. This is particularly true with the Deep Conditioner. I love how soft my hair feels after using it. All three products have similar scents. I'm happy to announce that it's pleasant and non-irritating to my sensitive nose. The formula is slightly "gel-like" and the shampoo lathers up relatively easily.

Word of warning, once you've used the Deep Conditioner, you'll find that the Conditioner is not as "powerful" in comparison and will be tempted to just stick to the Deep Conditioner. Too much of a good thing is never good, you should use it in moderation. Plus it'll be quite costly to use it as your everyday conditioner. Just make sure you cover all of your hair with Shampoo, not just your scalp. Rinse off. Apply Conditioner. WAIT for a minute. Rinse off. If you're in a hurry to wash the conditioner off, it will not get the chance to work its magic. I've been guilty of this crime before.

I hope that with continued use, the next time I post an updated review, my hair will be damage-free!

Do you suffer from split-ends and breakage like I do? Do share your hair woes! 
Saturday, October 19, 2013

OPI Drip Dry Review


OPI Drip Dry
Claims: "These lacquer drying drops touch dry nails in 60 seconds. OPI Drip Dry dries nails completely in five minutes."
RRP: AUD23.95
Packaging: 5 out of 5
Review: I hate the process of painting my nails. I'm impatient and sloppy. I usually get nail polish all over my fingers and have to painstakingly clean up with a cotton tip dipped in polish remover.  After waiting for half an hour for my nails to dry, I smudge the polish by accident. Then I have to start all over with that nail. Garh!! @#%^$!!

I recently received a bottle of OPI Drip Dry and I'm in love! This little magic potion guarantees that I don't smudge my nails by accident because it dries my manicure within 60 seconds! Literally! Okay, maybe it's not 100% dry... but it's touch dry. So still means no smudging. Yay! This product is very easy to use. After applying, your top coat, just squeeze one or two drops onto your nail.

I know you might say that it's very expensive for such a small bottle of product. Trust me, it'll last you quite a while because you're only using drops at a time. Okay, well what about fast-drying nail polish? Yes, there are plenty of those on the market but I find a lot of them gluggy. They'll either dry in "patches" or I still end up smudging my manicure because they don't dry fast enough.

Maybe I'm just being melodramatic but I seriously feel like this has been the life-changing product of the year for me! I'll definitely be buying a new bottle once this one runs out.


Do you struggling with at-home manicures like I do? Please do share! 

Wednesday, October 16, 2013

Blog Wonderful - An E-Book for Bloggers {A Review}

Source: http://wonderforest.storenvy.com


Blog Wonderful is a guide to blogging. It's written by Dana Fox, the brain behind the magnificent blog, The Wonder Forest. I've been following Dana's blog for a while now and it's one of the most informative and inspiring blogs out there. She shares really awesome blogging tips, especially when it comes to tech-related issues. So, I suggest you quickly zip over and follow her blog (before you forget), come back and read this review, okay? 

I wish I had found and read this e-book when I first started blogging! Okay, I lie. This e-book hadn't been written yet when I first started. Drat! It would have saved me a couple years' worth of trial and error. Dana had taken the liberty of documenting what worked/did not work for her during her first year of blogging. She then compiled everything into this neat little book. If you've just started blogging or are thinking of doing so, I highly recommend you read this guide. It'll take a lot of the guesswork out for you. 

You might think, "What if this is all a trick? A con?" I can vouch for Dana. I am not a pro, nor am I a beginner. What I do know is that I find myself agreeing with 99% of the advice that Dana gives in Blog Wonderful. Sorry, I can't remember what that 1% was. I found that the things she mentioned that are "must-do's" for blogging, are things that I'd already worked out myself and am currently practising. 

So, what if you've been blogging for a while now? Is this e-book still worth buying and reading? My answer is: it depends. If you've got well over 500 followers, chances are you know what works for you and you're on the right track. If you're like me, still struggling and in need of a bit of help, then give this e-book a try. Even though many of the nuggets of wisdom weren't new to me, it was reassuring to find out that I'm doing a few things right. 

I won't say anymore about Blog Wonderful because it'll ruin the fun of reading it. Once you start reading it, you won't put your iPod/iPad/iPhone/etc down until you've finished it. It's a very light and easy read. Dana writes in a very casual yet logical way. I felt like she was actually talking to me and teaching me in person. Blog Wonderful costs a reasonable USD6.99. If you're interested in getting yourself a copy, you can purchase it here

And just in case you're wondering, this is not a sponsored post. 


Do you know of any other blogging guides/e-books? Do share!
Saturday, October 12, 2013

Birthday Party Makeup Look


I threw a birthday party recently. And of course it was another opportunity for me to play with makeup. Unfortunately, the damned helium balloons took up a lot of my time and I had to do my hair and makeup as guests arrived. I achieved it all in approximately 45 minutes. I am definitely not trying to show off here. I actually forgot to put on my press-on manicure and perfume. Any how, it did not matter; no one noticed. My party didn't go exactly the way I planned it but ultimately, it was still a success! Everyone had a blast and I was really pleased. I guess the fun things in life are usually spontaneous.


Because I was in a hurry, I kept my makeup as simple as possible. Here's a list of products that I used. I'm really glad I chose them because they lasted all day.


  1. YSL Touche Eclat Foundation BR30
  2. hedkandi lashes by Eylure - Twisted Disco 
  3. MAC blush in Dame 
  4. Rimmel London Stay Matte Powder in Cashmere 
  5. Rimmel London Waterproof Gel Liner in Black
  6. Rimmel London Scandaleyes Mascara in Extreme Black 
  7. Rimmel London Apocalips Lip Lacquer in Celestial 
  8. Laura Mercier Metallic Creme Eye Colour in Alloy
  9. NYX Eye/Eyebrow Pencil in Charcoal and Dark Brown  
  10. Maybelline Instant Age Rewind Concealer 


I decided against doing a makeup tutorial for this look because it's simple and easy. I forgot to take a close-up of my face so the photo above is as close as it gets. Sorry, everyone! 


Ever had a party that didn't go according to plan but still turned out awesome? Please do share! 
Monday, October 7, 2013

Rimmel London Scandaleyes Eye Shadow Sticks Review & Swatches

Top to bottom: Bad Girl Bronze, Blamed Blue, Bulletproof Beige, Guilty Grey, Paranoid Purple, Witness White, Blackmail, Tempting Turquoise, and Gossip Green 

Rimmel London Scandaleyes Eye Shadow Sticks 
Claims: "Designed to provide rich colour in one easy stroke. Creamy, crease-proof, and waterproof colour."
RRP: AUD12.95
Packaging: 5 out of 5
Review: Rimmel London has been churning out a lot of good products lately. I'll keep this simple and sweet since there are many other raving reviews out there. These eyeshadow pencils/crayons are very creamy and smooth. They are long-lasting and do not crease. This invention is a lazy/time-poor girl's dream. Application is so quick and easy. I usually apply a colour all over my lids and then apply a dark colour on the outer corners of my eyes. Then, using my clean ring finger, I blend all the colours to make it look cohesive. And Ta-da! You're done!


Going from left to right: Witness White, Blackmail, Guilty Grey, Paranoid Purple, Blamed Blue, Tempting Turquoise, Gossip Green, Bulletproof Beige, and Bad Girl Bronze 

I love how pigmented these eyeshadow sticks are. My favourite combination is the Beige and Bronze. Yes, I know it's safe and kinda boring. But I love the Blue too. It's such a beautiful and daring colour. There's only one thing that I must warn you about; because the pencils are so soft and creamy, they break quite easily. So there's no point in making them mega sharp. Keep it blunt. If you want more precision, just swipe some colour off the stick with a brush.

Please let me know if you'd like to see a tutorial of me using a couple of these eyeshadow sticks.


Do you use eyeshadow sticks? What do you think of them? 
Thursday, October 3, 2013

HG Search: Pimple Buster - Mario Badescu Drying Lotion


Mario Badescu Drying Lotion
Claims: "Excellent spot treatment made with a blend of Calamine and Salicylic Acid to clear up and soothe unsightly whiteheads overnight."
RRP: AUD26.95
Packaging: 5 out of 5
Review: As much as I love my La Roche Posay Effaclar Duo Acne Treatment, lately I've found that it does not get rid of my pimples as quickly as it used to. Besides that, the product contains benzoyl peroxide, which means it leaves a "burn" mark on my skin once the pimple is gone. I needed something more efficient, effective and causes minimal "side effects".

I'd known about the Drying Lotion for quite a while but I was reluctant to purchase it because there was so much hype around this product. I finally caved when Jen from frmheadtotoe on Youtube convinced me that this product is amazing. I am happy to announce that I've found the perfect pimple buster for my skin! Thank you Jen!

This is an overnight treatment. My pimples literally shrink to nothingness by the time I wake up the next morning. And if the pimple is still there, it's very tiny, no longer hurts or looks red. All I then have to do is apply my Effaclar Duo to get rid of what's left. The best part is it does not leave a burn mark on my skin.

I hope you can discern from the photo above that this product has two layers. There's some pink solid at the bottom and yellow liquid over it. To use it, all you have to do is dip your cotton tip vertically down. Make sure it picks up some of the pink stuff as well. Dab the product over your pimple/acne and then get a good nights rest. Seriously, it's almost like magic!

The only reason I said it's "almost" perfect is because it's not ideal for travelling. The bottle is made of glass so there's a chance of breakage and it's slightly heavier (though, I do prefer glass bottles over plastic ones). And if the two layers get mixed because the bottle has been lying on its side in your bag, you have to set it up right and let it resettle into two separate layers. It takes a while (we're talking about hours here) for the pink stuff to settle so you can't use it immediately.

I really love this stuff and I definitely will repurchase it once it runs out. Holy Grail search completed.


Have you ever tried this product before? What's your HG pimple buster? 


Follow me on Facebook
Follow me on Bloglovin'
Sunday, September 29, 2013

Keira Knightley-esque Smokey Eye Makeup Tutorial


Hello, everyone! So as promised, here's the Keira Knightley Smokey Eye Makeup Tutorial that I filmed. I have a couple more tutorials planned and hopefully they will be up next month before I go into exam period. Anyway, I hope you like it!


Products used:
1. Essence Smokey Eyes Set in 02 Punk Vibe
2. Rimmel London Waterproof Gel Eyeliner
3. Benefit Bad Gal Lash Mascara
4. Bobbi Brown Creamy Concealer in Beige
5. Rimmel London Stay Matte Pressed Powder in 008 Cashmere
6. MAC lash #32
7. Urban Decay Naked Palette (eyeshadow in Virgin)


If you have any feedback, please feel free to leave it in the comments below!


Follow me on Facebook
Follow me on Bloglovin'
Thursday, September 26, 2013

HG Search: Skin Care Trial #1 - Burt's Bees and Jurlique

Sorry for being MIA guys! My academic life has been hectic and it unfortunately still is. I promise this does not mean that I'll be posting less frequently. I will do my best to schedule posts. I will be uploading my Keira Knightley Smokey Eye Makeup Tutorial tonight and then have it live on Saturday for your viewing pleasure.

I've trialled the following products for more than a month. I'm in search of my Holy Grail skin care routine. So I'll be reviewing more skin care products during my journey. Anyway, let's jump straight into this review!


Burt's Bees Radiance Facial Cleanser 
Claims: "contains jojoba beads to gently exfoliate the skin for a natural healthy glow. Encourages normal skin cell turnover leaving skin soft and brighter with added radiance."
RRP: AUD24.95
Packaging: 5 out of 5
Review:  This is a very light and gentle. It's ineffective at removing makeup. This is more for those who like it natural and organic. I have no issues with it except it's too gentle for my liking. I need something stronger to really clean out my pores. I do like that you can twist the pump to lock and unlock so it's excellent for travelling. The product is quite runny and the jojoba beads are quite scanty. Perhaps that's a good thing because it's not meant to be a scrub. It's a gentle cleanser after all. This product unfortunately, has not made any difference to my skin. Definitely no added radiance noticed.


Burt's Bees Radiance Toner 
Claims: "contains a blend of cleansing and softening ingredients to gently purify and tone the skin. Removes lingering traces of cleanser and any trapped dirt, oil and make-up leaving skin feeling fresh and radiant."
RRP: AUD24.95
Packaging: 4 out of 5
Review: Like its matching cleanser, this toner is very gentle. I feel it has not made any difference to my skin either. The packaging isn't as great as the cleanser. The product leaks whenever I put it in a makeup bag and travel with it. I will not be "repurchasing" this duo. Thank goodness, they came free. It was from the Blogstar 2012 prize pack that I won. Otherwise, I would have felt like I wasted my money.


Jurlique Balancing Day Care Cream 
Claims: "lightweight, moisturising cream formulated to help minimise the visible signs of ageing. smooth, silky and easily absorbed into the skin."
RRP: AUD50/AUD87 for 40mL/125mL
Packaging: 5 out of 5
Review: This is a thick moisturiser. If you're thinking of buying/using this product, I strongly suggest you press the product onto your skin rather than spreading it over your face like a standard moisturiser. Otherwise, you'd end up dragging your skin and create wrinkles. This cream protects my face from drying out. However, it does not infuse any extra moisture that I crave. My skin was just okay. I want a moisturiser than makes my skin extra smooth and soft.

I cannot tell you if this product has actually been protecting my skin from environmental damage. I haven't noticed any difference in my skin. Maybe I have not been using it long enough but at my age, I'd have to stick to this product for another 20 years before I can safely announce its efficacy in minimising signs of ageing. This is also another product that I got for free (it was a gift with purchase). I've stopped using this cream as a moisturiser for my face. Recently, I've been using it as a hand cream and I must admit that my dry hands love it! Too bad it's pricey so it won't be sustainable for me and my bank account to keep using this product as a hand cream.


Do you have any Holy Grail Skin Care products? Please do share!

Follow me on Facebook
Follow me on Bloglovin'
Sunday, September 15, 2013

Minimalist Makeup Tutorial

Hey everyone! I decided to film a "minimalist makeup tutorial". I wanted it up yesterday but video editing and uploading took forever. So apologies for the delay!


This is how I normally do my makeup when I'm in the hurry in the morning. It takes ten minutes max to complete the look, which is very fast for me considering I usually take an hour when I do my makeup properly.


Here's a list of the products that I used:

1. Benefit Benetint
2. Rimmel London 9-in-1 BB Cream in Light
3. Bobbi Brown Creamy Concealer in Beige
4. Shiseido Eyelash Curler
5. Benefit BadGal Lash Mascara
6. Rimmel London Stay matte Pressed Powder in Cashmere
7. RealTechniques Multitask Brush
8. Urban Decay Naked Palette Eyeshadow (Virgin)


What do you think of this look? Will you give it a try?

Follow me on Facebook 
Follow me on Bloglovin'
Wednesday, September 11, 2013

Blog Sale

Hey everyone, instead of throwing these products out, I thought I might just check with you guys in case you want them. For most of them, all you have to do is pay for the postage and it's yours. This blog sale is only open to Australian residents.

If you're interested in getting any of the products listed below, please email me at ty.blog.epi@gmail.com


5 Strips left in each. Just pay for postage.


More than 3/4 left. Just pay for postage. 


Used only once (both). $3 + postage. 


Used approx. 5 times. More than 3/4 left. Just pay for postage. 


Used approx. 7 times. More than 3/4 left. $10 + postage. 


Used only once. Just pay for postage. 


Unopened. $5 + postage. 


Used approx. 10 times. Just pay for postage.